Staff Accounts & Permissions
Add team members, organise them into groups, and control exactly what each person can see and do within the system.
Approx. 10 minutesBefore You Start
- You need administrator access to manage staff and permissions.
- Decide on the roles you need (e.g. Site Manager, Office Admin, Accounts) before creating groups.
Part 1: Managing Staff Accounts
-
Navigate to Staff Settings
From the sidebar, go to Settings > Staff. This page has three tabs: Staff (user accounts), Groups (permission groups), and Trades (trade groups for labour costing).
 1 Staff tab — manage individual user accounts.2 Groups tab — create and manage permission groups.
 -
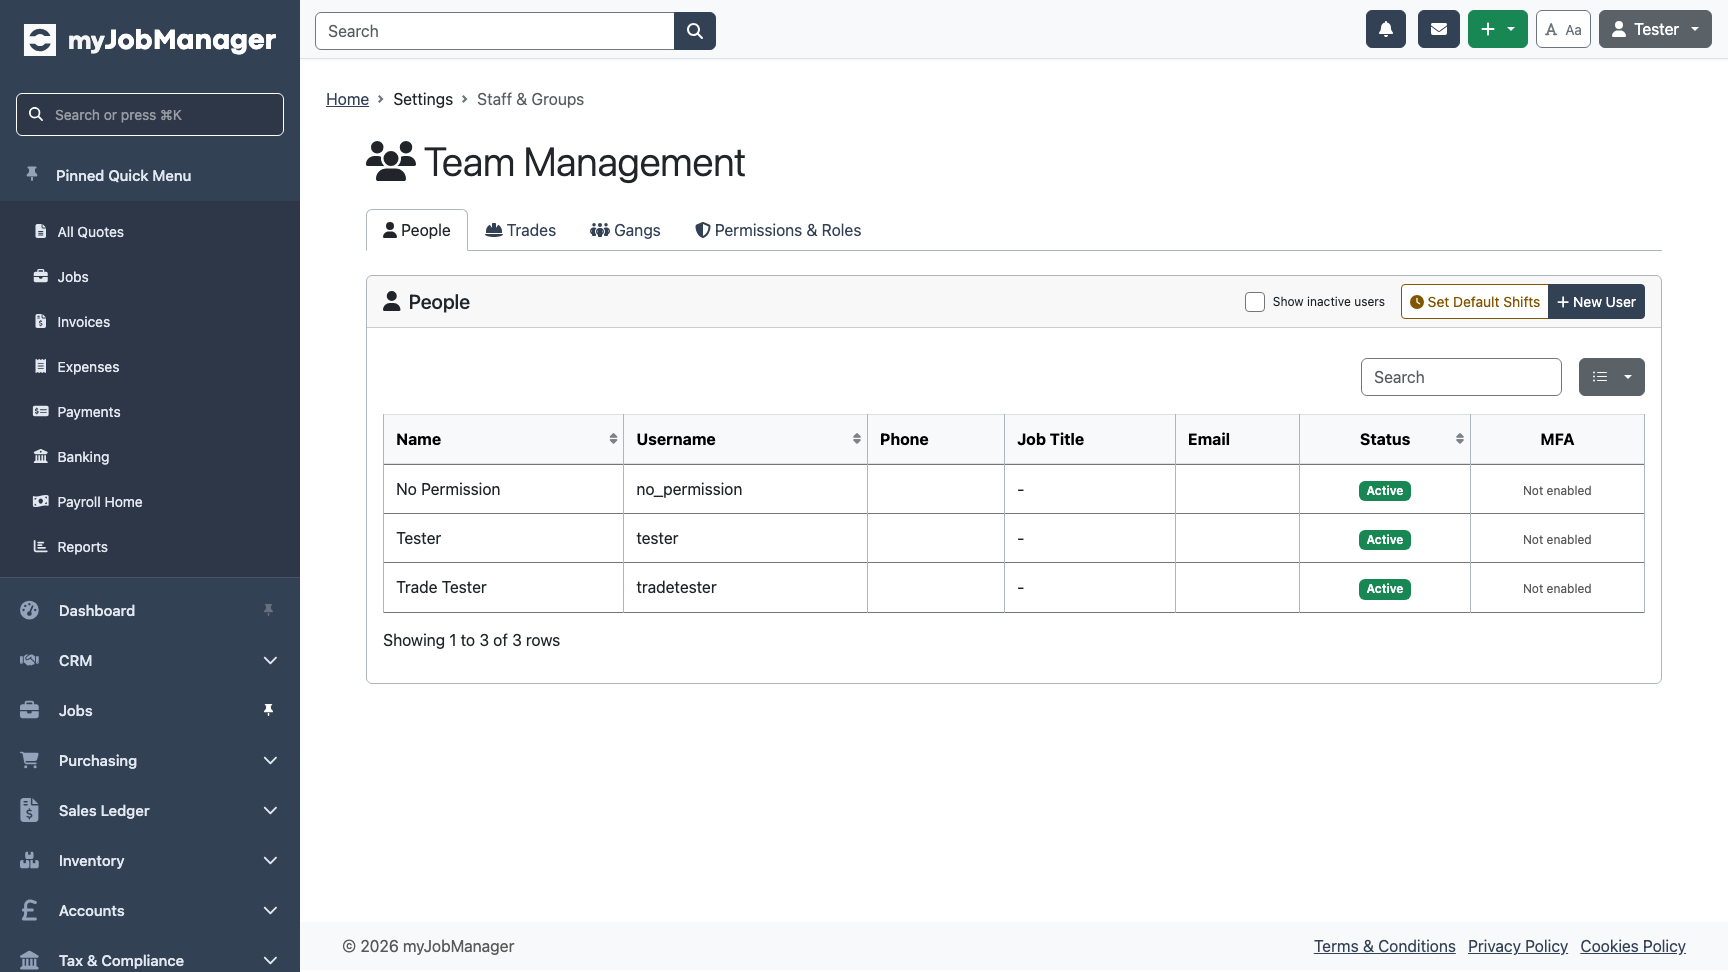
View the Staff List
The Staff tab shows all user accounts in your organisation. You can see each person's name, username, job title, and whether their account is active or inactive.
 1 Click "New User" to add a new staff member.
 -
Open the New User Form
Click "New User" to open the user creation form. You'll need to provide a name, username, and optionally an email address and job title.
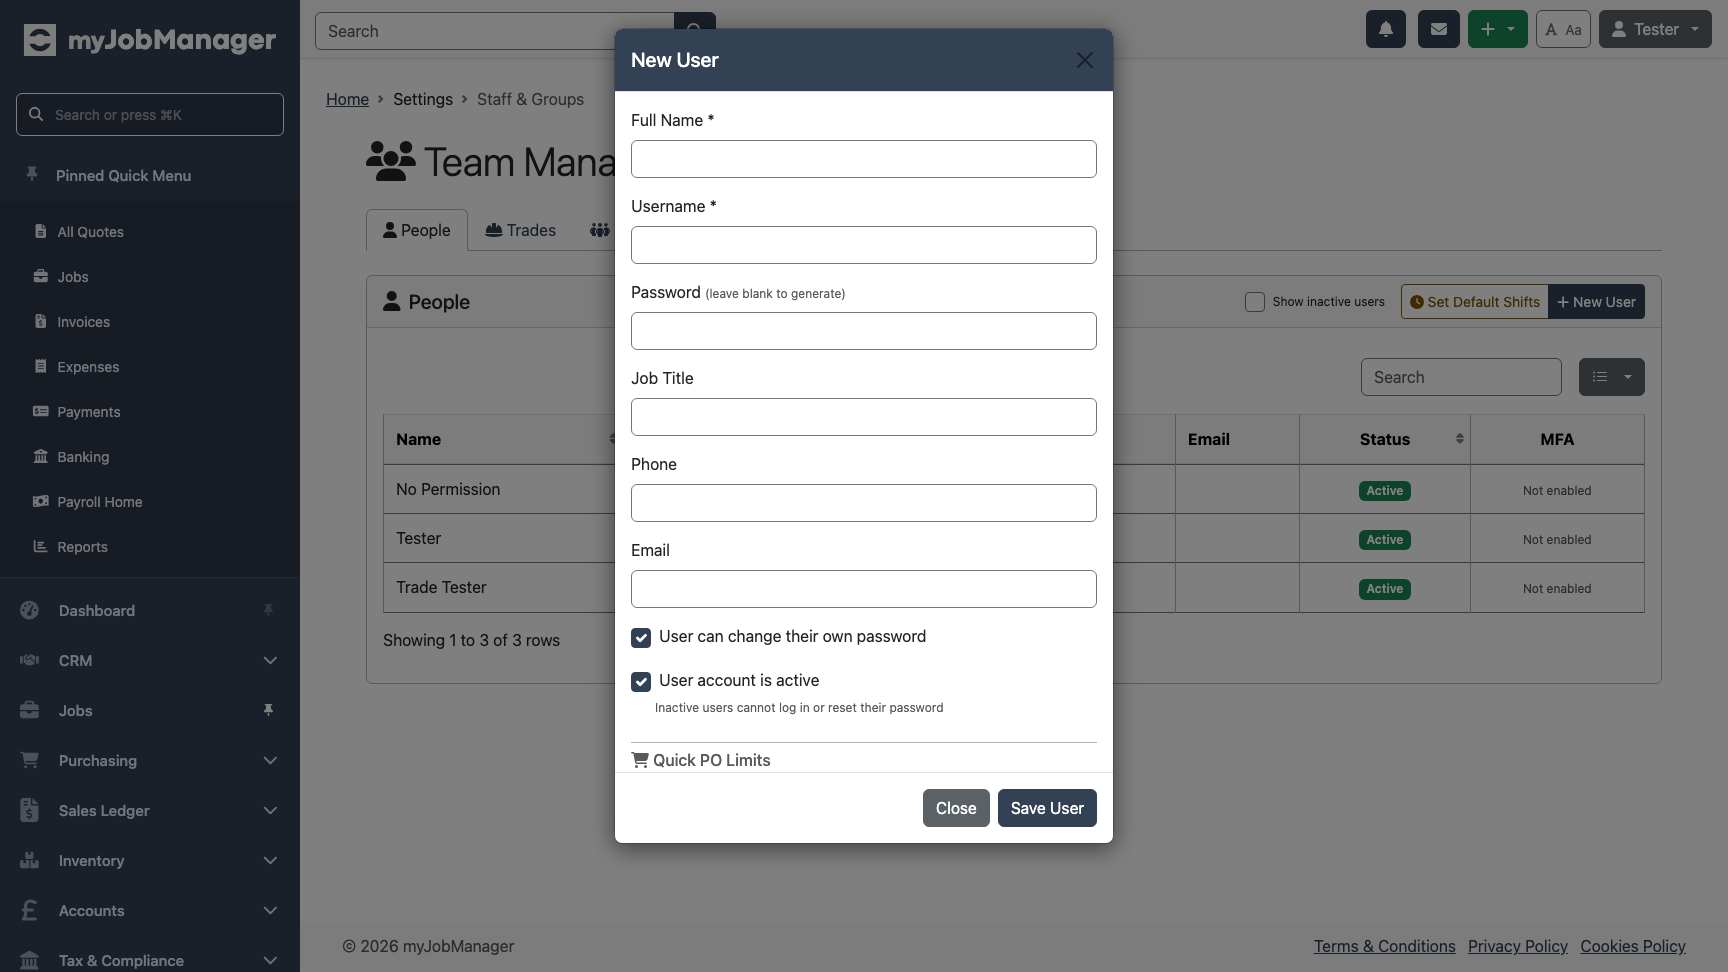 1 Enter the staff member's full name.2 Choose a username — this is what they'll use to log in.
 -
Complete the User Details
Fill in the remaining details. The email address is used for notifications and password resets. The job title helps you identify team members at a glance.
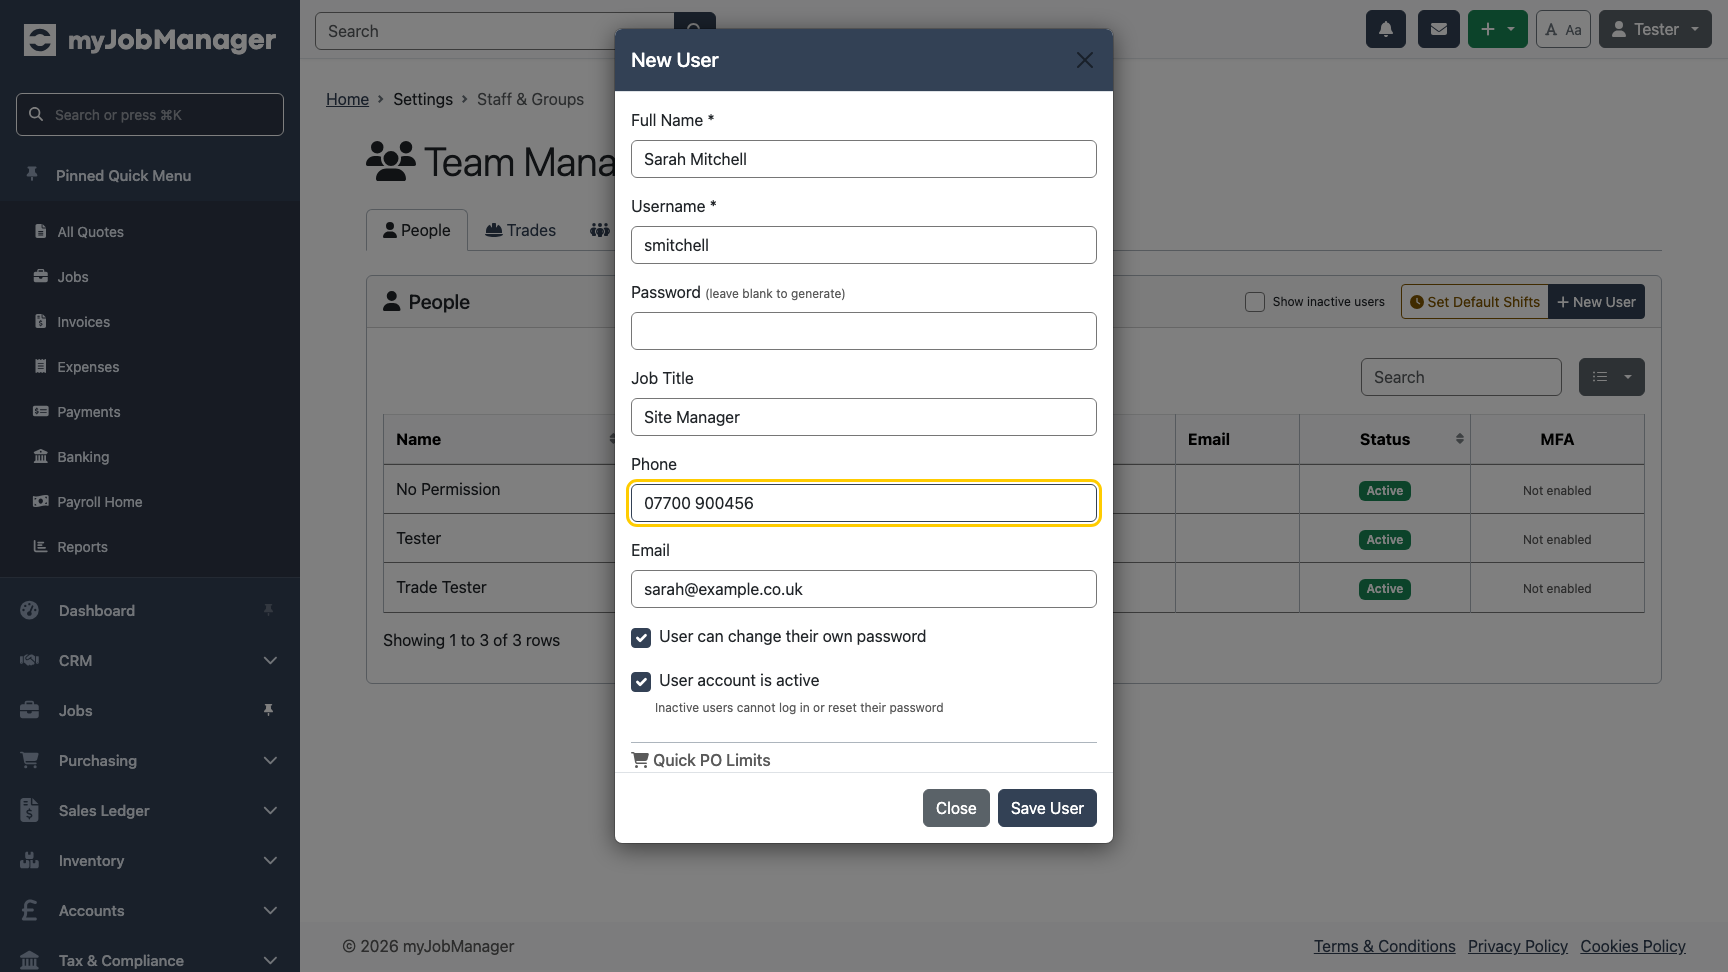 1 Email — for notifications and password resets.2 Job title — displayed in the staff list.
 -
Account and Password Settings
Configure account security options. You can allow the user to change their own password and set whether the account is active. When you save, the system generates a temporary password that you give to the new user.
 1 Can change password — lets the user update their own password after first login.Tip The temporary password is shown only once when the user is created. Make a note of it or copy it straight away to share with the new team member.
Part 2: Permission Groups
How Permissions Work
myJobManager uses a group-based permissions system. Instead of setting permissions on each user individually:
- You create groups (e.g. "Site Managers", "Office Staff", "Accounts Team").
- Each group has a set of permissions (e.g. can view invoices, can create quotes).
- You assign employees to groups — they inherit all permissions from every group they belong to.
- Permissions are additive — if any group grants a permission, the user has it.
-
Switch to the Groups Tab
Click the Groups tab to manage permission groups. You'll see existing groups and can create new ones.
 1 Click "Create Group" to add a new permission group.
 -
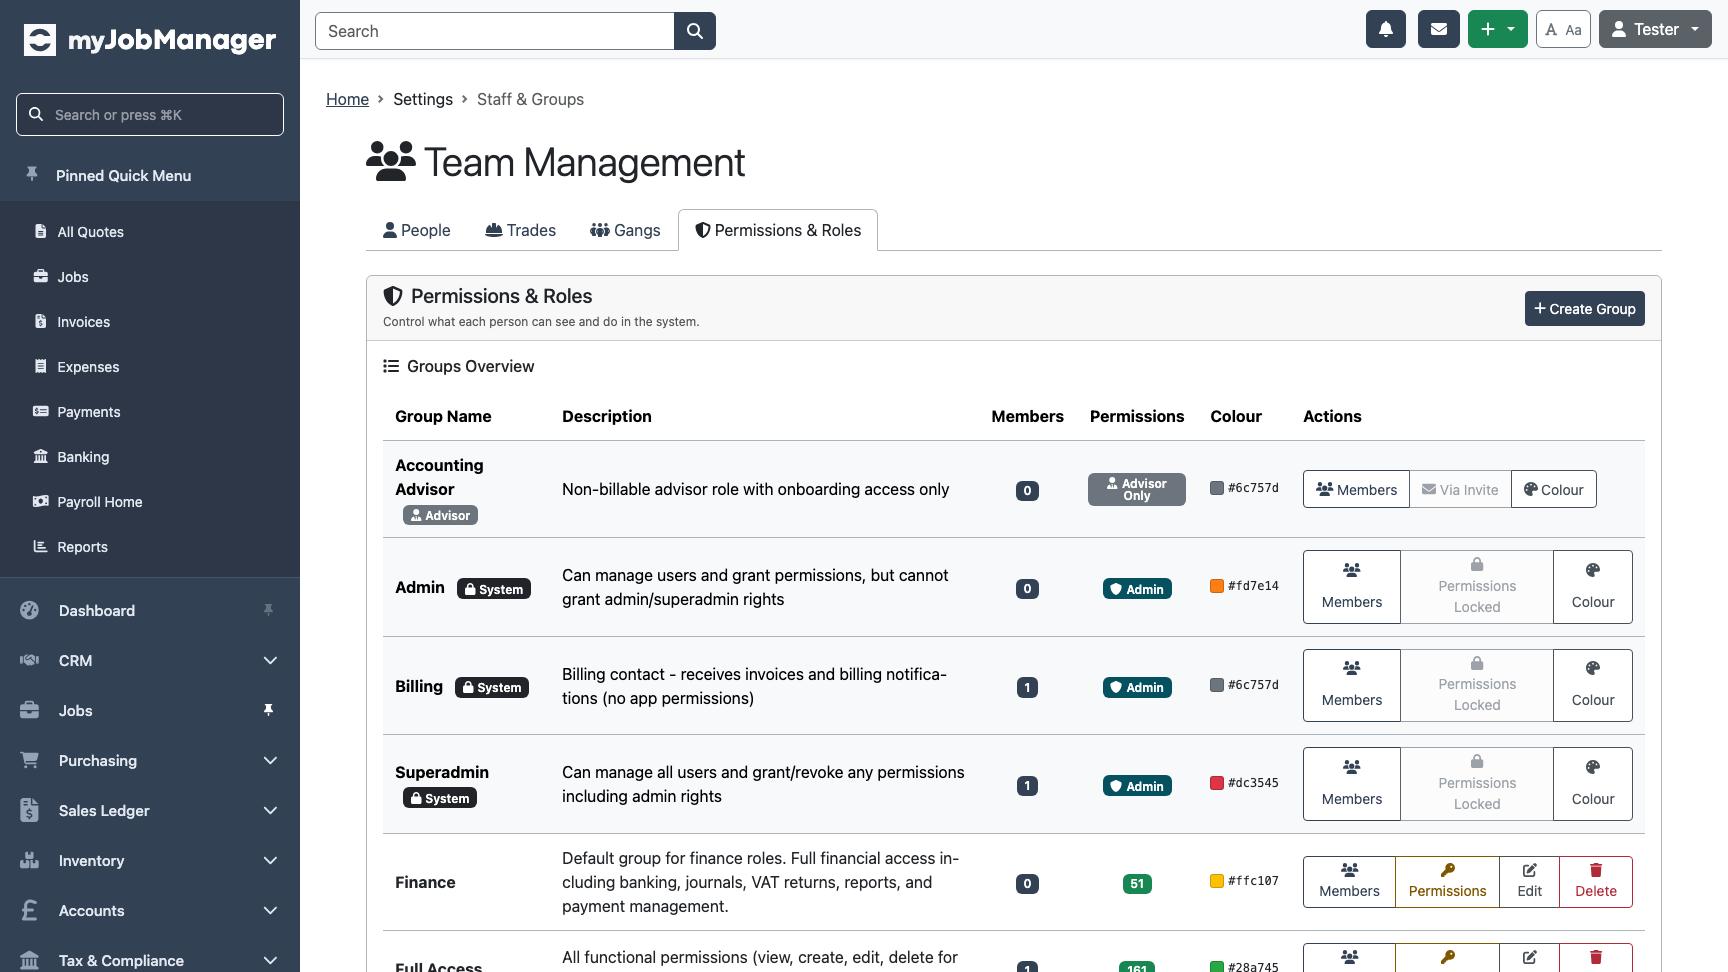
Review Existing Groups
The groups table shows each group's name, description, member count, and number of permissions assigned. Use this to understand what groups already exist before creating new ones.

-
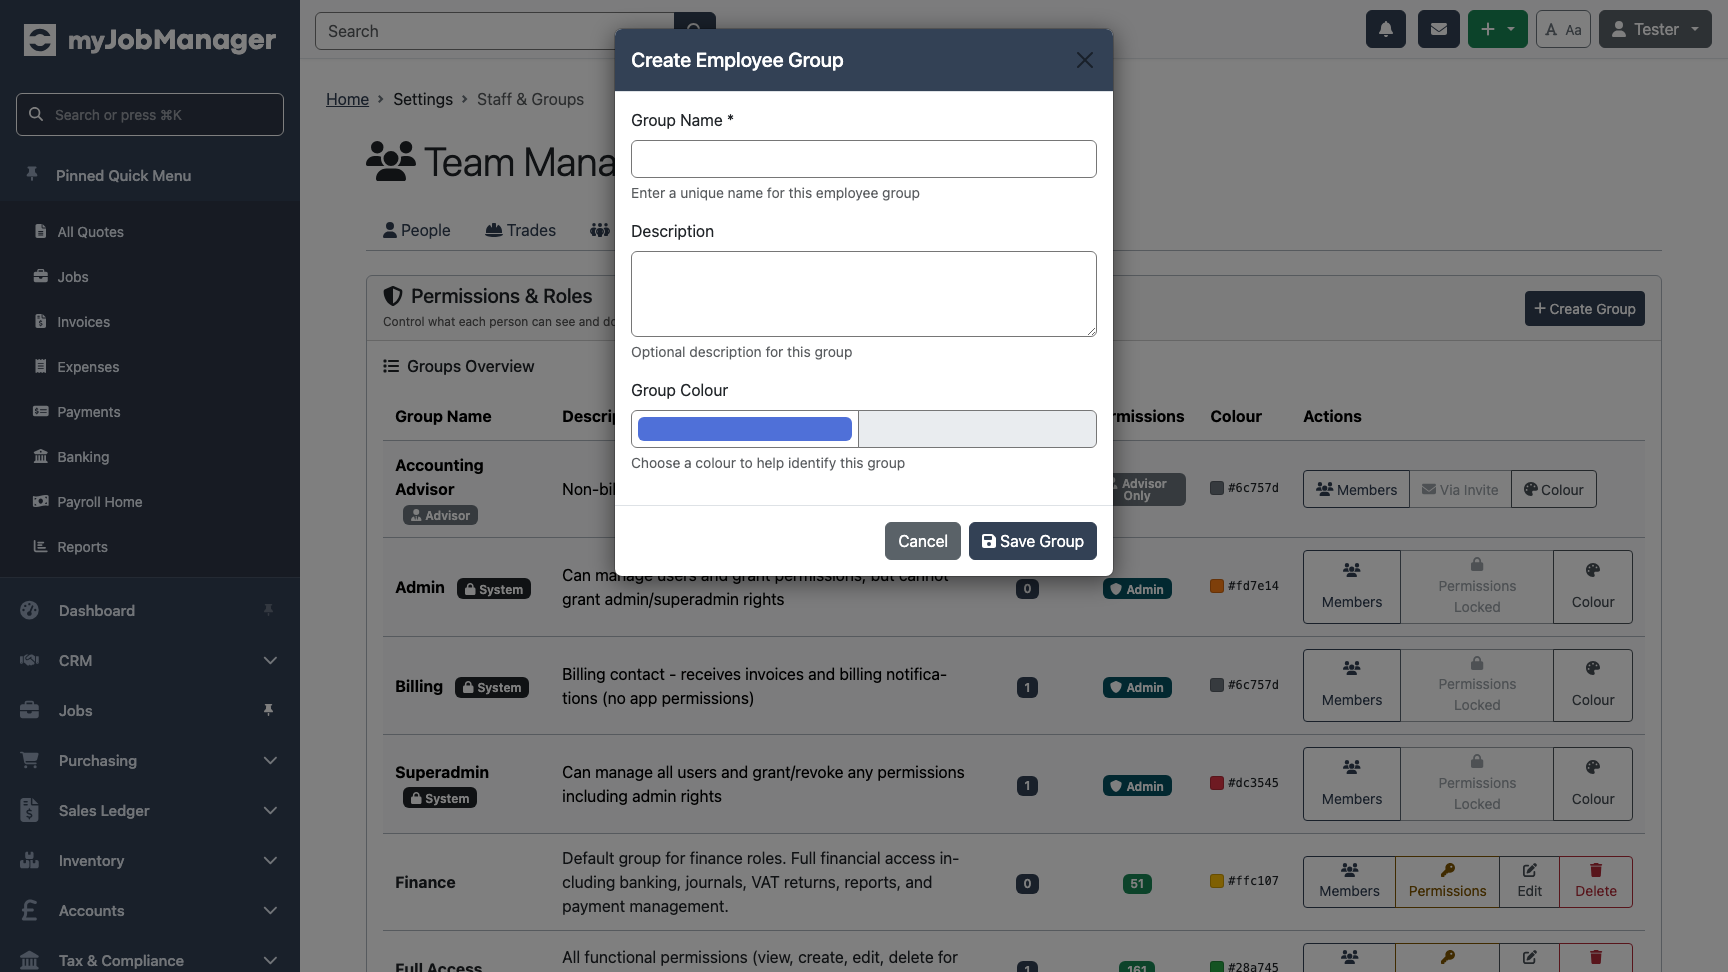
Create a New Group
Click "Create Group" and give it a descriptive name (e.g. "Site Managers"). Add a description and choose a colour to help identify the group at a glance.
-
Set Group Permissions
After creating a group, click "Manage Permissions" to configure what members of this group can do. Permissions are organised by module — Invoices, Quotes, Jobs, Payroll, Accounting, and more.
 Tip Start with minimal permissions and add more as needed. It's easier to grant access than to revoke it.
 -
Assign Employees to Groups
The Employee Group Assignments section (below the groups table) shows which employees belong to which groups. Click "Manage Members" on any group to add or remove employees.
 Tip Employees can belong to multiple groups. Permissions are additive — if any of their groups grants a permission, they have it. For example, a user in both "Site Managers" and "Accounts Team" gets all permissions from both groups.